
2.13 Smoke and Heat Detectors
Your home is protected by a smoke detector and a heat alarm. The units are hardwired to the mains electricity with a battery backup to ensure operation in the event of a power failure.
There are four types of alarms installed throughout the development.
In your apartment, you will have one of the following heat alarms:
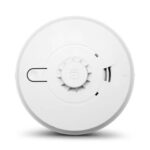
BG Mains Powered Heat Alarm

Aico Ei144e Heat Alarm
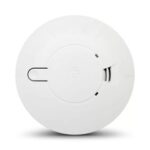
BG Mains Powered Optical Smoke Alarm
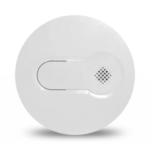
Aico Ei146e Optical Smoke Alarm
Alarm Instructions and Maintenance
The backup battery in your alarm is replaceable and should be a 9V alkaline or lithium battery, depending on the model. Only use the recommended battery type as specified in the instruction manuals above.
The unit itself should be replaced approximately 10 years after installation. A small sticker on the outer casing indicates the replacement date.
A small green indicator light (LED) should be visible through the detector grille, indicating that the alarm is receiving mains power. A red LED will flash every 40 to 50 seconds, to indicate normal operation or self-test status.
If smoke or heat is detected, the alarm will emit a loud pulsating alarm, and the red LED will flash rapidly until the air is clear.
If the alarm sounds without any visible signs of smoke, heat, or fire, follow these steps:
-
- Evacuate immediately and ensure everyone is in a safe place before investigating.
- Check the entire property carefully in case there is a small fire smouldering somewhere.
- Do not disconnect the alarm. If no fire is found, ventilate the room and press the hush button, if available, to temporarily silence the alarm for 10 minutes.
Testing Your Alarm
Regular testing is recommended to ensure your alarm is functioning correctly. Some models automatically conduct weekly self-tests.
To manually test your alarm:
- Press and hold the test button for approximately five to ten seconds.
- A loud pulsating alarm should sound, and the red LED should flash.
- The alarm will stop once the button is released.
For interconnected alarms, test each unit individually to confirm that all alarms in the system are triggered correctly.
Maintaining Your Alarm
To reduce false alarms, clean the detectors regularly, as dust buildup can affect performance.
-
-
- Vacuum around the detector grille and sides using a soft brush attachment.
- Wipe the outer casing with a clean, damp cloth. Do not use sprays, detergents, or chemicals.
- Check that the green mains power light is on.
- If the green LED is off, the alarm is running on battery backup, and the mains power should be checked.
- Beeps indicate a low battery. Replace the 9V alkaline or lithium battery as specified in the manual.
- If the beeping continues for more than two hours, the battery may be faulty, and the unit must be replaced.
- If the alarm beeps persistently with the green light on, it may indicate a sensor fault. Refer to the troubleshooting section of the manual or replace the unit if necessary.
-
Battery and Power Information
Backup Battery Type:
- Use only the recommended 9V alkaline or lithium battery.
- The backup battery is replaceable and is not permanently sealed.
Backup Power Duration:
- The manual does not specify an exact duration, but backup power is intended for temporary use if mains power is lost.
Battery Replacement Steps:
- Turn off mains power before replacing the battery.
- Use only the recommended battery type.
- Follow the installation steps in the manual carefully.
Covering the Alarm During Decorating
When redecorating, use the provided red dust cover, if supplied, to prevent dust or paint contamination. Remove the cover once decorating is complete. If no dust cover is provided, ensure the alarm is protected from dust and debris.